 It’s a fact that you can repair as many multimeters with a bottle of isopropyl alcohol and some Q-tips (cotton buds), as you can with a soldering iron. In many cases, malfunctions can be fixed by careful disassembly and cleaning of affected parts. Only simple tools and materials are required, but caution is recommended so as not to damage any of the components or plastic bits.
[Click on any of the following pictures in this article for a larger view. All graphics used in this article are also available as an image gallery.]
This Fluke 83-III looks like a prime candidate for this sort of low-tech repair. It basically works and seems to be calibrated correctly, but occasionally when set to measure Ohms, the display will flicker a bit and only display “OL”, regardless of whether the leads are connected to anything, or even shorted together. A slight tap on the rotary switch will cause it to start working correctly again. Odds are, there’s a minor problem with the internal switch contacts.
[To my knowledge, this procedure applies to any of the generation-I and generation-III 80-series meters.]
To begin the disassembly, there are three self-tapping screws that hold the outer case together. After removing those screws, gently pull apart the two halves of the case at the bottom near the input jacks. The top edge will eventually unsnap. The front cover, back cover and internal meter assembly will separate cleanly into three pieces. We’re interested in the meter assembly.
Remove the one screw on the back side. This releases the two halves of the shield. The rear half of the shield has two T-shaped tabs at the top edge that interlock with the circuit board. Mind these tabs when pulling the shield off, and do not break them. You will find the piezo beeper element affixed to this part of the shield.
The front half of the shield contains the LCD assembly and is held onto the PCB by four barbed clips.
These clips are very fragile!
Gently push each one until it passes by the edge of the PCB.
Note that this model has a backlight which has a two-pin connector that must be disconnected.
The LCD is connected to the PCB via two elastomeric connectors (often called “zebra strips”.) When these strips do not make good connection with the PCB, some of the LCD segments may disappear or look faded. Do not touch the surface of these connectors, as skin oils can inhibit connectivity. They can be cleaned with isopropyl alcohol (IPA) and a Q-tip.
On the back side of the PCB you will find a black rotor, which is part of the ‘code switch’. This switch is responsible for turning the power on, and providing a signal to the micro-controller indicating which function has been selected.
Use non-metallic tools to gently pry the rotor from the hub. When prying be careful not to apply too much pressure to the SMD resistors, as they can break. The rotor should pop off with gentle pressure.
[These are “spudgers”, available often as part of cell-phone/laptop repair tool kits.]
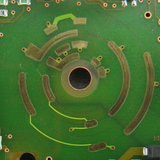
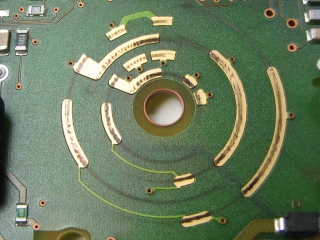
The code switch tracks in this case do not look too bad. Use Q-tips and alcohol to clean the tracks. NOTE: On the original 80-series meters, these switch tracks are not metal, but are made from a black conductive material called polymer thick-film (PTF). This material is somewhat fragile, so use caution to avoid damaging it, and never use anything abrasive.
These weren’t too bad to begin with, but a good cleaning never hurts.
Remove the top white rotor and examine the function switch tracks.
These tracks are badly fouled. This is no doubt the cause of the intermittent faulty behavior.
In some cases such as this one, I find a fiberglass scratch brush to be helpful without doing any damage (if used sparingly.) A light brushing followed by thorough clean-up with Q-tips and IPA, restores these contacts back to good condition.
Don’t forget to clean the rotor contacts as well.
Re-assemble the switch by gently and evenly pressing the black rotor back onto the hub. Gently press the LCD/front shield assembly back onto the PCB, making sure that all four clips are secure. Then attach the rear shield by aligning the T-shaped tabs on its top edge and re-installing the screw.
Before putting the case back together, position the switch rotor to the OFF position as indicated by the pointer. Also place the knob in the OFF position. This is important and will ensure correct alignment and operation of the switch.
Make sure the battery wire is free and clear and is not going to be pinched. Snap the top edges of the case together first, then press the bottom edges together.
A small dab of petroleum jelly on each of the self-tapping screws will help them to turn easily and help protect the plastic screw posts from breaking. Try to make sure the screws seat properly in the original threads and avoid cutting new ones.
After re-assembly, the intermittent fault has disappeared, and this meter has been repaired without even turning on a soldering iron.
 It’s a fact that you can repair as many multimeters with a bottle of isopropyl alcohol and some Q-tips (cotton buds), as you can with a soldering iron. In many cases, malfunctions can be fixed by careful disassembly and cleaning of affected parts. Only simple tools and materials are required, but caution is recommended so as not to damage any of the components or plastic bits.

bom dia amigo, tenho dois multimetros 85 III, você consertaria eles seu eu manda-se pra você? moro no Brasil, maranhão, São Luis CEP 65047240
Edit: [Google Translate: Good day friend, I have two multimeters 85 III, you would fix if I send them to you? I live in Brazil, Maranhão, São Luis CEP]
I’m sorry but I don’t operate a repair service, this is a hobby. I suspect the shipping charges would exceed the value of the multimeters, anyway.
Hi,
I have a Fluke 175.. My screen is blinking all the time when i turn it on. I can select anything, Volts, Ohms… It looks like i would change the rotary selector all the time. On the display i can see changing from Ohms to Volts, to amps, I can hear it beeping , and so on.
I just opened to change the 10 amp fuse(i had a 5 amp in it). I put everything together and it was ok. After few minutes i realized that the beeper is not working. I opened it arranged the beeper …and after this it went crazy.
No screws fallen, no parts touched with screwdriver.
After this i cleaned display contacts, and rotary switch contacts. Everything was clean before also, but i cleaned it anyway to be sure.
I would appreciate any advice.
Thanks
I’ve never seen one do that before. It sounds like the microprocessor has just gone crazy, or it is getting bad signals on the lines from the rotary switch that select the function.
Have any tips of what to look for on a Fluke 83 III where all indicated current readings are significantly off (fuses are ok) but everything else (VDC, Resistance) is ok?
Thanks,
Aaron
I am going to try this on my DT-9205M cheap multimeter that stopped working after it sat (battery removed). No display seen. battery added->still ng. used other mm to see right voltage when power button pushed in.
Also HP E23277A battery leaked inside and corroded some components so HP said probably needs need circuit board. Too costly. I will try your method since I have nothing left to lose.
Keep you posted.
My fluke 87 III has a broken finger on the rotor contacts.
This part…
http://mrmodemhead.com/blog/wp-content/gallery/8xsw/8xsw_017.JPG
One of the four small fingers is broken off, about half-way up. Where can I get a new part, hopefully something after market.
My old Fluke 87 started turning on when flexed and eating batteries whilst not being used, so I thought I would give suggested cleaning a go. It seems very similar to the 83 in your pics.
So far it seems to be much better. Here are some pics
Note that the contacts actually look black – for some reason they look brown due to lighting/camera…
Top
https://www.dropbox.com/s/9ct7z32ekcf6ql2/20151018_151506.jpg?dl=0
Bottom before cleaning
https://www.dropbox.com/s/8c39av37evrbgs8/20151018_151525.jpg?dl=0
After clean
https://www.dropbox.com/s/r1dq2538cdjc4rl/20151018_152236.jpg?dl=0
Thanks for the inspiration…
Thank you so much for the detailed repair guide. I got my Fluke 87 III used and it was electrically ok. Just the rotary knob caused the display showing blanks or I had to press the rotary knob to get any DC Voltage display.
I took it apart, cleaned contacts with 99% Isoprop. Alc. and glass fiber pen. It worked better but the issue was not fixed. Finally decided to order a spare rotary knob. Here in Germany you can do it only via Conrad if you are non commercial.
It works perfect, the knob now is 1mm higher than the Fluke case, doesn’t matter, but the Ranges now work perfectly. It was a mechanical issue, a worn out knob 🙂
Part No. 2100482 FLUKE 87-5-2504 KNOB, SWITCH
It is the 87V Knob, as the 87 III seems not to be available anymore. Costs EUR 14.- plus shipping.
So for all of you with an old worn out 87III this is a good solution.
Cheers
Ralph
BON JOUR j’ai besoin d’un afficheur pour multimetre fluke 83lll je vous pris monsieur / madame de me renseigner merci
just wondering if anyone knows where to get a rotary assembly for a fluke 87 (from 1991). rotary is wacky in mine and needs replacement.
thanks
Hi, Can you tell me where I can find a replacement case bottom for my fluke 87 meter? I lost mine.. Thanks, Ron
My switch is a tad different than yours: yours is white resin and has a white arrow to align to the off position. Mine is black resin and the hex nut and doesn’t have a reference arrow to point to the off position for alignment. How do i make sure the off switch is in the off position.
Thanks for the great site.
My 87 has different type of rotary switch. The backside of the PCB has a similar black plastic contactor and black conductive traces on the PCB. The front side of PCB has a (seemingly) more robust switch assembly with metal fingers and contacts and this is physically soldered into the PCB. I’m getting the flashing “OL” bug in ohms mode a lot. Any idea for cleaning the older style mechanical switch?
I have a Fluke 83 iii in need of a new rotor? do you know where/if I can get hold of one???