
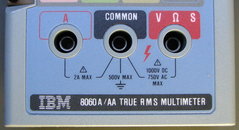
 Not much time for blogging these days, but this one is overdue. A reader of this blog was kind enough to send me his retired IBM 8060A/AA multimeter. (Thank you HK.) This is really a Fluke 8060A in a light blue/gray case, with IBM branding. Presumably IBM bought a lot of these for their engineers, field technicians, and laboratories. It even came with its own special blue service manual, which another friend gifted me with a copy, so that I have a matching set for Mr. Modemhead’s Multimeter Museum.
This turned out to be what I would consider a textbook case of 8060A restoration with the usual problems brought on by electrolytic capacitor leakage, plus a damaged LCD. From initial appearances, it’s not worth the time to do any sort of trouble-shooting. Just dive in and take care of the obvious problems, then see what happens. For that reason I spent no time trying to power up the unit until the damages were assessed and the necessary parts replaced.


 shows some contamination as well.")


.")

Leaks Don’t Always Come From The State Department
Electrolyte wicks up the legs of components and causes corrosion and problems. In this case it affected the elastomeric connector going to the microprocessor and its associated PCB pads. It destroyed one of the contacts in the 40-pin socket for the custom MAC (Measurement Acquisition Chip), which was “fun” to remove. No special de-soldering equipment was used, just a temp-controlled iron and a generic solder-sucker. And then some solder-wick to clean up. The PCB is very well-made and sturdy, it seems to withstand this rework quite well.
Another common failure, apparently caused by electrolyte, is the destruction of the 8-pin DIP ICL7660 charge pump. It provides the negative Vss supply for the meter, from the +5.2V supply. It was tested, found to be bad, and thus added to the list of replacements.
Parts List
This is a list of the parts ordered from Digi-Key. The capacitors are all Nichicon UTT series. The capacitor selection was done on two basic criteria: physical size, and a 105°C temp rating for long life.
| Digi-Key Part No. | Description | Component Designation |
|---|---|---|
| 493-10382-1-ND | CAP ALUM 100UF 20% 6.3V RADIAL | C1,C23,C24,C32,C34 |
| 493-10390-1-ND | CAP ALUM 10UF 20% 16V RADIAL | C12,C21,C28 |
| 493-10393-1-ND | CAP ALUM 22UF 20% 16V RADIAL | C36 |
| 493-10396-1-ND | CAP ALUM 47UF 20% 16V RADIAL | C19 |
| ICL7660CPAZ-ND | IC REG SWITCHED CAP DBL INV 8DIP | U4 |
| ED3033-ND | CONN SOCKET IC 40-PIN T/H | XU3 |
After the parts were replaced, the board was thoroughly cleaned by immersion in about 1/4″ (6-7 mm) of IPA (isopropyl alcohol). A disposable “acid brush” is used to get some scrubbing action in between components. It is important to remove flux residue and any other contamination from the PCB, or the meter may be inaccurate and/or fail to zero out with no input.
A word about the push-button switches: In my experience, I’ve had very few problems that I could associate with these very sturdily-made push-button switches. Others have reported problems with them though. After a period of non-use, it is a good idea to exercise them repeatedly and vigorously. As for cleaning, I didn’t deliberately spray anything inside, but I did blow them out with compressed air after dunking the board in IPA, because some liquid will usually splash up in there.
On The Road To Recovery
Powering up the meter after the new parts are installed is very promising, as the test point voltages are all within spec. It is permissible to power the unit without the display assembly and microprocessor in place. It is not a good idea to power it without the 40-pin MAC chip installed, because it performs part of the voltage regulation.


. Also good.")
Liquid Crystal Destruction
The LCD on this one is in bad shape. The rear polarizer is definitely damaged, resulting in the burn pattern. For an extreme repair, it is possible to peel the back off and replace this with some generic polarizing film and a reflective surface. I’ve tried various things including tin foil, but what seems to work best is just some bright white paper, as in high-quality inkjet paper. But that won’t work in this case because the LCD also has the “bleeding” effect, which is a defect inside the glass sandwich, and not thus not repairable. I don’t know where to buy a new LCD, so I had to wait to find a parts donor unit on eBay, that wasn’t over-priced by the seller.


New Life For An Old Horse
The moment of truth arrives after the “new” LCD is installed and the pieces are reassembled. It turns out in this case the tactic of going straight for the usual suspects and spending minimal time trouble-shooting, was a winning approach. The unit came straight to life. It zeroed out after a few seconds within ±1 count, which I consider to be nominal. A quick check of its calibration revealed that it really didn’t need any adjustment at all, but I did tweak it to match my 1.9V reference.


")
Once again, thanks to HK for sending this unit in. Hopefully this story will inspire or help someone else refurbishing their vintage DMM.
Thank you for posting this! I have the exact meter, and I found out that Fluke no longer support repairs on this product. I have fixed so many things using my Fluke 8060 A, and I refuse to trash it. My symptom is that when I power it up, all the LCD segments are illuminated and the meter won’t function. That symptom suggests that C16 is open, but from seeing this, I need to order and replace all these old capacitors. If I had a dollar for every PC System Board with swollen or leaking capacitors, I would be a rich man. I guess it is time to order the parts and break out the soldering iron, and solder wick!
Bad electrolytic caps are the most common problems for these meters, so it’s not a bad idea to just replace them and go from there. Check TP2 and see if you need to order a 7660 as well. Good luck on your repair, hope you get your meter going again.
I opened my meter up, and to my surprise, there were no swollen capacitors, and I could not see any leakage. I reassembled it, and to my amazement, it started working! Perhaps reseating all the connections helped. All I know is I’m one happy camper to have my trusty 8060 A back and functional. The lead set I have has some long and skinny tips to measure high voltage on some of the large Hubble type recepticals under the raised floor in the data center. While I also like the Fluke 179 I have, it did not come with all the goodies the IBM Technician version of the 8060 A. I may have had to order that lead kit separately, but it has been so long ago, I can’t remember.
I’m glad you got your meter working without too much work. Sometimes cleaning and re-seating connections can do wonders.
I would classify the failing condition that I had as a “Power Self Test Hang”.
Wow im amazed how good the lcd looks now, very readable indeed.
I liked the Guilty capacitor lol, silly bugger :-D.
I remember the +/- 5v generator problem from another of your repairs, those capacitors just dont last LOL joking of cause :-D.
Im not supprised at the accuracy, they didnt use cheap references.
So into the wheelbarrow of excellence :-D.
Hope your well.
Hello there sir, thanks for checking in. Yeah, still here, things about the same as usual.
Since the earlier 8060A article goes into such trouble-shooting detail, this one makes short work of the basic stuff that seems to affect the early 8060As, which is the leaky caps, the 7660 charge pump, and board contamination. Benefit of experience I guess. If I had just plowed ahead with the first one without doing all that trouble-shooting (ie. clean-clean-clean, replace parts, clean-clean-clean), the outcome would have been about the same!
You are putting yourself down, you are the master of multimeter repair, its no Fluke that you have repaired so many lol.
Repairing something gives satisfaction and stops you getting bored, also it can get you away from other thoughts that bring your mental state down.
I have looked in to your site every so often, having a look at older repairs, and using your links to other sites :-).
Stop kissing that fluke LOL 😀
WOW! I’m so glad I found this blog.
My grandfather worked and retired from IBM back in the early 90s.
I found his 8060A yesterday and have been working with it to see if it still works.
What you’ve documented is so helpful. I have the bleeding in the LCD.
When I turn the unit on, it shows I F F F F then switches to a “.backwards L .backwards L .backwards L .backwards L” then starts switching back and forth between the 2 screens until it’s a full-on seizure.
I’d really like to get it to work for sentimental reasons.
Any ideas? Thanks again for your work here, it’s been super helpful!
The bleeding cannot be fixed unfortunately. The other symptoms are probably caused by a bad connection with either or both of the elastomeric connectors (zebra strips) under the LCD. There’s one from the main board to the processor board, and another one from the processor board to the LCD itself. Try disassembling and cleaning with strong isopropyl alcohol. Careful with aging plastic bits, they can sometimes be brittle.
How do I find the serial number on my 8060a’s? The only number I can find on the case is stamped on the upper right side of the rear shell. The numbers are 3865546 and 3560055 but these do not seem to be in line with the numbers in the manuals e’g., 632661. I can’t seem find this information and want to be sure I’m using the correct manual, etc.
Thanks, Bob E
Serial numbers are embossed in the plastic at the top of the rear shell. Fluke sold this model for an unusually long time, well into the 90s. The more recent models were updated with a new RMS converter, mounted on a sub-assembly. The manuals available online refer to this updated model, but are generally sufficient for servicing the old models, except for the RMS converter section of course.
How did you remove the MAC?
Stick a small screwdriver under it and slowly work it up, as evenly as possible, by prying and turning the blade of the screwdriver.
I bought an 8060a recently and it turns out it has problems. It doesn’t seem too bad though, it’s mostly when I test for AC from an outlet that it gives me weird numbers. The instructions I see on this site are far beyond what I could do myself. Does anyone know of a place that I can send mine in for repair?
I’m sorry I don’t know where you can get your 8060A repaired. With the wide availability of inexpensive DMMs, such repairs are just not cost-effective.
hello
An info
After 32 years the “old” 8060A s / n 3131537 makes the crazy.
I went to short-lasting the external power connector and then wound everything ok.
wired ignition switch with sprays all ok.
Question in all functions except ohm the display is well behaved when switching to function ohm the display shrinks very much.mi You can help thanks
I’m sorry I do not fully understand your English, but for the oldest of these models I do recommend replacing the electrolytic capacitors, and cleaning the circuit board thoroughly with strong isopropyl alcohol (IPA).
Any ideas on retrofitting a bleeding LCD display with a TFT 1.8 or 2.2 LCD with Arduino interface?
This is my first post to this blog.
I have the IBM branded 8060A, which I had since new when I worked at IBM. It stopped working a few years ago. It’s been a while since I have done board repairs and replacing capacitors. I am not sure I can tackle that repair and don’t want to ruin it. Similar to some others here, I would like to repair it for both sentimental as well as functional reason. If anybody knows of a place or person that could repair it, I would welcome any suggestions.
Recently i repaired my new aquired 8060A. After placing a new MAC and caps it works fine again, exept the DC-ranges above 2 volts: the deviation was several volts.
According the manual the fusible resistors near the inputs or the divider network including the switches are suspicious. But after checking those components they all appear OK.
The PCB was allready thoroughley brushed before with IPA… exept the part below the switches wich is hard to reach. But afther cleaning them as well all the DC ranges where within specs again!
My fluke187 startup alarm (Lerds), the single A current stall does not alarm, how to solve?
hola
necesito el integrado del fluke 8060a
I have access to lots of tantalum caps. Any reason why tantalum would not be better than electrolytic caps?
The only reason they did not use Tantalum capacitors is because they costed more. Their ESR is far superior to electrolytic caps. Tantalum caps may not be optimal for replacing the charge-pump capacitor C-21 (10uf) because it changes polarity (AC) and Tants dont like reverse polarity at all.
hola amigo necesito este integrado de fluke 6127138244168
I just found your site and am so happy that I did. I have an old IBM 8060A that I used when I worked as a contractor for IBM in Palo Alto from 1987 till 1991. My meter stopped working and could not find anyone to repair it for me. I could not throw it away so I put it in my toolbox. This meter has been packed away for at least 15 years. It does not read AC voltages and DC voltage readings are incorrect. The display is very clear. Do you service/repair these units? If not, can you recommend someone who does?
Thank you,
Tom
I’ve made new pcb’s for the 8060A as mine had a lot of corrosion damage. Exact replica, all parts and vias and trace routing match the orig pcb. I can make these available for a small fee if there is any interest.
I am really confused regarding C19 discovery during my recap. On my 1000V SER 3700XXX version unit I have the original yellow C19 capacitor same as the guy on YouTube (https://www.youtube.com/watch?v=zSDy6jYdyAU). Both his and mine are installed with polarity opposite the schematic and opposite of silkscreen + on board. What?? Which is it supposed to be? Bad schematic and board mark, or incorrect factory install?
Hi, I have a great 8060 fluke that I’ve used for years, my only issue is the range buttons won’t hold in and this drives me mad. Do you have any suggested fix for this.